

Deciding to build a Shopify theme from the ground up is a big step. It’s about moving past the off-the-shelf templates to get full-on, granular control over how your brand shows up online and, just as importantly, how it performs. This route opens the door to a truly one-of-a-kind design, blazing-fast site speed, and the power to add custom features that most pre-built themes just can't handle.
Why Build a Custom Shopify Theme?
Look, the Shopify Theme Store has some great options to get you started. But a custom-built theme is a completely different animal—it's a serious strategic asset. Think of it like this: you can rent a furnished apartment, which is convenient, or you can design and build your own home. The second option is a perfect reflection of your vision and exactly what you need.
Achieve a Unique Brand Identity
Stock themes are used by thousands, sometimes tens of thousands, of other stores. That makes it incredibly tough to stand out. When you build your own Shopify theme, you’re not just picking a different color scheme; you’re breaking free from cookie-cutter layouts entirely.
Every pixel, every animation, and every single user interaction can be intentionally designed to reinforce your specific brand identity. This creates a memorable experience that a generic template, by its very nature, can't match. Your storefront becomes more than just a place to sell things—it becomes a true extension of your brand’s story.
Optimize for Unmatched Performance
Pre-built themes are often bloated. They come packed with tons of features and code to appeal to the widest possible audience, which almost always slows down your site. A custom theme, on the other hand, is built with only the features you actually need. The result is lean, clean, and highly optimized code.
This has a massive impact on site speed, which we all know is a critical factor for both happy customers and high search engine rankings. A faster site keeps people from bouncing and leads directly to more sales. It's really that simple. Building custom also lets you bake in a comprehensive ecommerce SEO strategy from the very beginning.
When you build your own theme, you take complete ownership of its performance. You can make sure every image is perfectly optimized, every script loads efficiently, and the entire structure is engineered for speed from day one.
Implement Custom Features and Workflows
Does your business need a unique product customizer? A specialized wholesale portal? Or maybe a very specific customer journey that guides shoppers in a unique way? These are the exact scenarios where stock themes hit a wall.
A custom build lets you weave in complex features seamlessly, without having to rely on a messy patchwork of third-party apps that might conflict with each other. If you want to get into the nuts and bolts of it, you can read our deep dive into https://scaleshopify.com/shopify-custom-theme-development/.
The demand for these kinds of high-performance, tailored themes is only growing. In 2025, Shopify's ecosystem continued to expand, with over 2.58 million live stores globally and solid quarter-over-quarter growth. This ballooning market is hungry for themes that are lightweight, fully responsive, and packed with smart features like AI-driven personalization to serve a huge variety of merchants. You can see the data for yourself over at storeleads.app.
Setting Up Your Local Development Workflow
Before you write a single line of theme code, you need to get your workshop in order. Trying to build or edit a Shopify theme directly on a live site is a rookie mistake that can lead to broken storefronts and a whole lot of stress. A proper local development setup is non-negotiable—it lets you build, test, and break things freely on your own computer, all without a single customer ever noticing.
The magic behind this modern workflow is the Shopify CLI (Command Line Interface). Think of it as your direct line to Shopify's servers. It lets you spin up a local server that mirrors your development store, giving you a live preview that updates instantly every time you save a file. This instant feedback loop is a massive productivity booster, cutting out the old, tedious process of manually uploading files just to see a small change.
Essential Tools for Shopify Theme Development
To get started, you'll need a handful of core tools. Each one plays a specific role in making the development process smooth and efficient.
| Tool | Primary Purpose | Why It's Important |
|---|---|---|
| Shopify CLI | Connects your local machine to a Shopify store | Enables live previews, theme syncing, and command-line management. It's the engine of your workflow. |
| VS Code | Code Editor | A powerful and customizable editor where you'll write all your HTML, Liquid, CSS, and JavaScript. |
| Dawn Theme | Starter Theme | A modern, fast, and accessible base theme to build upon, saving you from starting from scratch. |
| Node.js | JavaScript Runtime | A prerequisite for many modern web development tools, including the Shopify CLI. |
Having these pieces in place from the beginning sets you up for a much more professional and enjoyable development experience.
Getting the Shopify CLI Up and Running
Your first real task is to install the Shopify CLI. The process varies slightly depending on whether you're on macOS, Windows, or Linux, but Shopify has clear instructions in their developer documentation. Just make sure you have any prerequisites, like Node.js, installed first.
Once the installation is done, you need to link the CLI to your development store. It's a simple command: shopify login --store your-dev-store-name.myshopify.com. This will pop open a browser window for you to log into your Shopify account, securely connecting your computer to the store. It’s a one-and-done step that unlocks the entire workflow.
You’ll get used to seeing something like this in your command line.
The CLI gives you clear feedback, which makes even complex tasks feel straightforward.
Choosing and Cloning a Starter Theme
There's absolutely no reason to build a theme from an empty folder. In fact, doing so is often a waste of time. The smart move is to start with a rock-solid foundation, and Shopify’s own Dawn theme is the perfect choice. It’s built with performance, accessibility, and the latest Online Store 2.0 features in mind.
With the Shopify CLI, you can pull a fresh copy of Dawn right onto your computer with a single command. This instantly gives you a complete, functional theme structure ready for you to customize.
Starting with Dawn is a huge advantage for a few key reasons:
- Built-in Best Practices: You’re already aligned with Shopify’s standards for speed and accessibility from day one.
- Huge Time-Saver: All the boilerplate files and foundational code are already there, so you can jump straight into the fun part.
- A Great Learning Tool: By exploring its files, you can see how a professional, modern theme is put together.
My Advice: Always start with a base theme like Dawn. It saves you dozens of hours of tedious setup and lets you focus your energy on what truly matters: creating a unique look and feel that represents the brand.
Optimizing Your Code Editor
Your code editor is your digital workbench, so it pays to spend a few minutes setting it up right. Most developers I know use Visual Studio Code (VS Code) because it's free, powerful, and has a massive ecosystem of extensions.
For Shopify development, there are a couple of must-have extensions. First, find a good Shopify Liquid extension in the marketplace. This will add syntax highlighting and autocomplete for all your .liquid files, making the code much easier to read and helping you catch errors on the fly. I also highly recommend an auto-formatter like Prettier. It automatically cleans up your HTML, CSS, and JavaScript to maintain a consistent style, which is a lifesaver when you're working on a team or have to come back to a project months later.
Getting Around a Shopify Theme: Architecture and Liquid

Alright, you've got your local environment running and you've cloned a theme like Dawn. Now for the fun part: figuring out what all these files and folders actually do. Understanding the theme architecture is non-negotiable if you want to build a Shopify theme effectively. Every folder has a purpose, and knowing the layout is like having a map of a city before you try to navigate it.
At first, the file tree can look a little intimidating. Don't worry. You'll spend 90% of your time in just a few key directories. Let's break down the ones that matter most for day-to-day development.
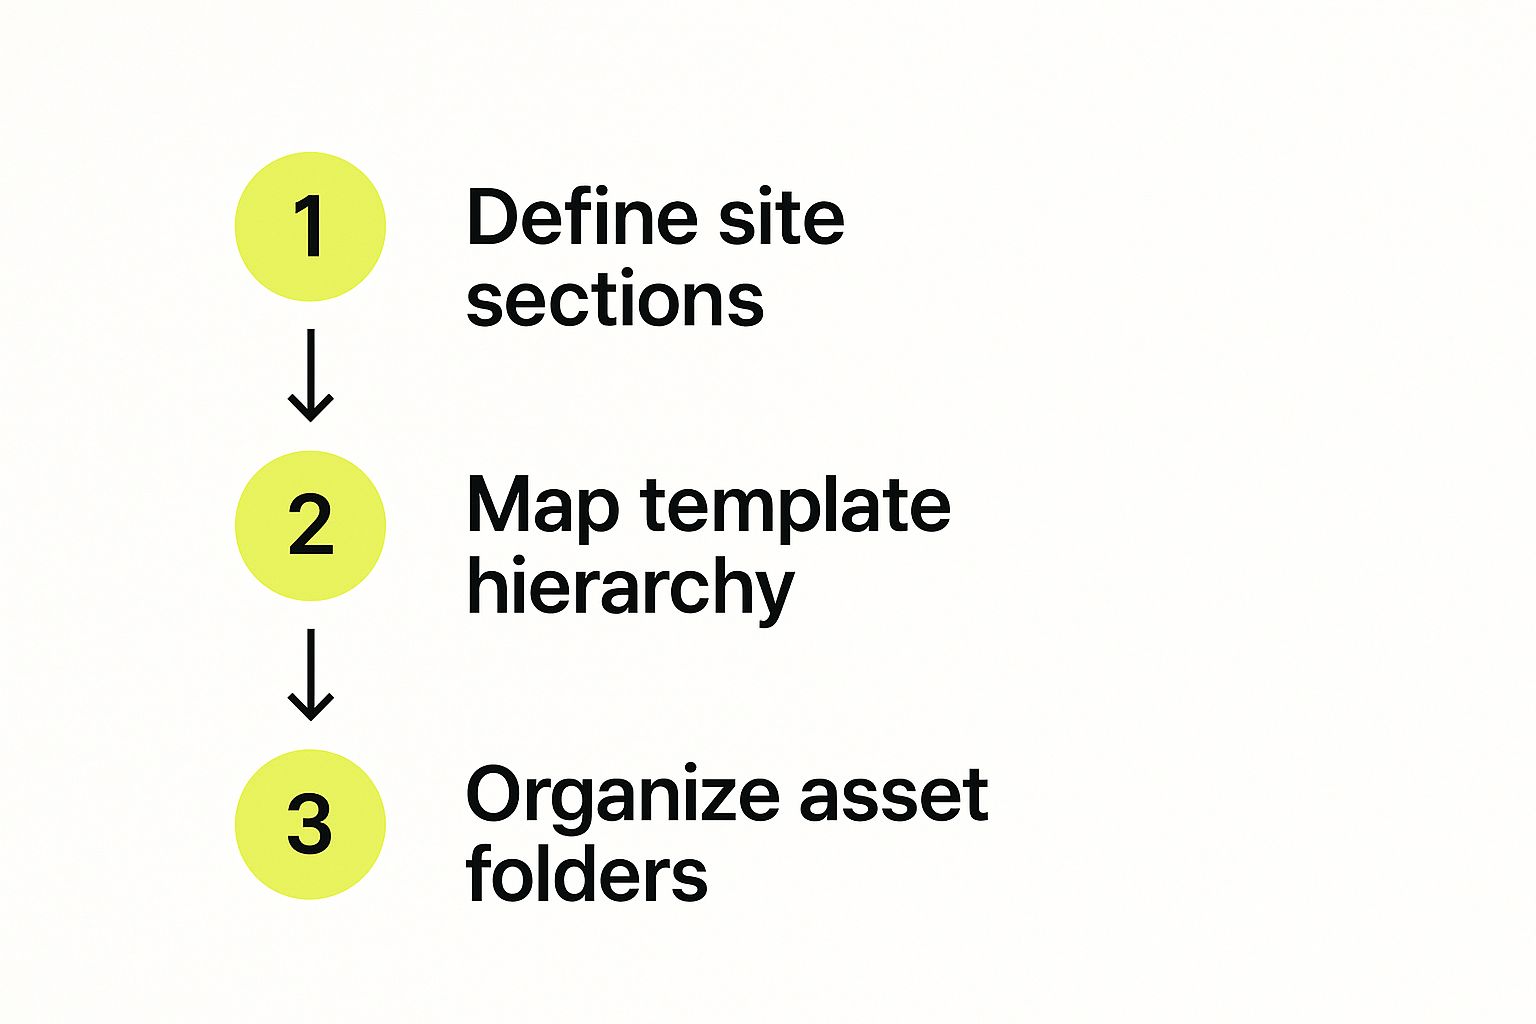
The Core Theme Folders
Think of these as the main building blocks of your entire store. Any change you want to make, whether it’s a tiny visual tweak or a major structural overhaul, will start in one of these folders.
layout: This holds the master template,theme.liquid. This one file is the skeleton for your entire site. It contains the<head>tag, the site-wide header and footer, and a special marker that tells Shopify where to inject the content for the specific page you're on.templates: This is where you map out the structure for different page types, like products, collections, or the homepage. In modern themes, you'll see files likeproduct.jsonorcollection.json. These JSON files simply list which sections to display on that page type, giving merchants control in the theme editor.sections: These are the heart of a modern Shopify theme. Sections are the modular, reusable content blocks that merchants can add, reorder, and customize. A "Featured Product" block, an "Image with Text" banner, or a "Testimonials" slider are all examples of sections.assets: This is your catch-all folder for static files. All your CSS, JavaScript, images, and custom fonts belong here. It’s the toolbox for all your visual and interactive elements.
Once you grasp this separation of concerns, everything starts to click. The layout is the frame, templates are the page-specific blueprints, sections are the customizable furniture, and assets are the paint and tools you use to bring it all to life.
Introducing Liquid: Your Theming Language
Now that you know where the files live, let's talk about what's inside them. Shopify themes are built with Liquid, a templating language created by Shopify itself. Liquid is the magic that connects your static HTML code to the dynamic data from a merchant's store—like product names, prices, and inventory.
You'll spot Liquid code right away. It uses two distinct syntaxes:
- Double curly braces
{{ }}are for output. - Curly braces with percent signs
{% %}are for logic.
This is how you can show a product's title or loop through a collection of items without ever hardcoding that information.
Liquid is what turns a static HTML file into a living, breathing Shopify store. Getting comfortable with its basic syntax is the single most important skill for any aspiring Shopify theme developer.
You'll constantly work with three main parts of Liquid when you build a Shopify theme:
- Objects: Think of these as variables that hold your store's data. For example,
{{ product.title }}is an object that outputs the title of whatever product page you're currently viewing. - Tags: These handle the logic and control flow. You'll use tags like
{% if product.available %}to decide whether to show an "Add to Cart" button or{% for product in collection.products %}to create a grid of products. - Filters: These are simple methods for changing the output of your objects. You chain them using a pipe character
|. A classic example is{{ product.price | money }}, which takes a raw number (like2995) and formats it beautifully into a currency string (like$29.95).
This trio of objects, tags, and filters is what gives you the power to create complex and data-driven storefronts from scratch.
Putting It All Together: A Practical Example
Let's walk through a real-world scenario. A customer visits a product page.
First, Shopify loads the main layout/theme.liquid file. Then, it checks the templates/product.json file to figure out which sections need to be rendered for a product page.
Inside one of those section files, you might find a snippet of code like this:
{{ product.title }}
Price: {{ product.price | money }}
{% if product.compare_at_price > product.price %}
You save {{ product.compare_at_price | minus: product.price | money }}!
{% endif %}
This simple block pulls in the product's title and its formatted price. It then uses a logical if tag to see if the product is on sale. If it is, it uses a couple of filters (minus and money) to calculate and display the exact savings. This is the fundamental workflow you'll repeat over and over.
While you could build a theme from an empty folder, almost nobody does. The vast majority of developers start with a solid foundation like Dawn, and for good reason. Shopify offers over 100 themes, but the free Dawn theme is used by an incredible 25.2% of all stores, making it the most popular choice by a huge margin.
Why? Because a well-optimized theme has a direct impact on sales. The top 10% of Shopify stores see conversion rates over 4.7%, while the average store hovers around 1.4%. Starting with a proven, performance-first theme gives you a massive head start. You can find more insights into how theme performance affects sales by checking out these Shopify statistics from WebFX.
Styling Your Theme and Adding Interactivity
https://www.youtube.com/embed/O-fCDaGeJ1g
Once your theme’s structure and Liquid logic are in place, it's time for the fun part: breathing life into the design. This is where you'll use CSS and JavaScript to turn that structural blueprint into a storefront that’s not just visually appealing but also a joy to use. A sharp, intuitive design doesn't just look professional—it guides your customers through the buying journey.
How you manage your styles and scripts has a massive impact on your store's performance. A rookie mistake I see all the time is dumping every line of CSS into one giant file. It might seem easy at first, but it quickly becomes a nightmare to manage as your theme evolves. There’s a much better way.
Structuring Your CSS for Maintainability
When you build a Shopify theme, thinking about your CSS organization from the get-go will save you a world of hurt later on. My go-to strategy is breaking CSS into smaller, more focused files inside the assets directory. For example, you might create separate files for the header, footer, product cards, and even global style variables.
This component-based method makes your code:
- Easier to navigate: Need to tweak the header? You know exactly which file to open.
- More reusable: Styles for something like a button are self-contained, so you can apply them anywhere with confidence.
- Simpler to debug: When a visual bug pops up, you can zero in on a specific component’s stylesheet instead of hunting through thousands of lines of code.
Shopify's build process can even stitch these smaller files into a single base.css file for you, giving you all the organizational benefits without hurting performance. It’s the perfect way to build a clean, scalable foundation for your design.
Pro Tip: Always style for mobile first. Write your CSS for the smallest screens, then use
min-widthmedia queries to layer on styles for tablets and desktops. With most e-commerce traffic coming from mobile devices, this ensures the best possible experience where it matters most.
Adding Dynamic Functionality with JavaScript
Static websites are a relic of the past. Today’s online stores are full of interactive elements—think image carousels, slick pop-ups, and shopping carts that update without a page refresh. This is all thanks to JavaScript, which lets you create the dynamic experiences modern customers expect.
And just like with your CSS, organization is everything. Resist the urge to write all your JavaScript in one monster file. Instead, I strongly recommend a modular approach. Create separate JS files for different features: one for your slide-out navigation, another for a custom product gallery, and so on.
This keeps your code tidy and stops different scripts from clashing with one another. When you build a Shopify theme, this modularity also makes it easier to load scripts only on the pages that actually need them—a huge win for page speed. For example, a script powering a product video gallery has no business loading on your homepage.
Interactivity is also getting smarter. Themes in 2025 are seeing a huge shift, driven by AI and a laser focus on mobile-first design. AI-powered personalization is now becoming a reality, allowing stores to show custom product recommendations based on a shopper's browsing habits. And since mobile commerce drives around 70% of Shopify sales, a fast, touch-friendly interface is non-negotiable.
Performance and User Experience Enhancements
Every line of CSS and JavaScript you add contributes to your page’s size and, ultimately, its load time. Optimizing these assets isn't just a "nice-to-have"; it's critical for keeping users engaged and boosting your conversion rate. Nothing makes visitors bounce faster than a slow-loading site.
Here are a few practical steps you can take to keep things zippy:
- Minify Your Assets: Minification strips out all the unnecessary characters from your code files, like spaces and comments. This shrinks the file size without changing how it works.
- Lazy Load Images: Don't force the browser to load every image on a page at once. Use lazy loading to defer off-screen images until the user actually scrolls to them. Shopify’s
image_tagfilter has built-in lazy loading capabilities that make this easy. - Optimize Interactivity: For boosting customer engagement directly, think about integrating a chat feature. You can explore the top ecommerce live chat platforms to see what's out there. Implemented correctly, a good chat tool can seriously lift sales without bogging down your site.
Focusing on these performance details ensures that the beautiful, interactive theme you've built is also lightning-fast. For a deeper dive into these kinds of tweaks, check out our complete guide on Shopify theme customization.
Testing and Deploying Your Custom Theme
You’ve poured hours into crafting the perfect look and feel. The styles are sharp, the JavaScript is slick, and your Liquid logic is pulling in data flawlessly. Now comes the most critical phase before you pop the champagne: testing.
Trust me, skipping this step is a rookie mistake. It’s like building a race car and never taking it for a practice lap—a recipe for disaster on launch day. Rigorous quality assurance (QA) isn't just about catching bugs; it’s about making sure every visitor has a professional, seamless experience. A broken link or a weird layout on a specific browser can kill a sale in an instant.
Creating Your Pre-Launch QA Checklist
A structured testing plan is your best defense against those dreaded launch-day surprises. Don't just click around randomly. Instead, build a repeatable checklist that covers every part of the user journey. Once you’re happy with the styling and functionality, it’s time for some serious QA. For a deep dive, you can learn how to effectively QA a website to ensure your theme is rock-solid.
Your checklist should be broken down into key areas to guarantee you don't miss anything.
Essential Testing Categories:
- Cross-Browser Compatibility: Open your site on the latest versions of Chrome, Firefox, Safari, and Edge. What looks pixel-perfect in one browser can often look completely broken in another.
- Responsive Design Checks: Fire up your browser's developer tools and simulate various screen sizes. At a minimum, check on mobile, tablet, and desktop breakpoints. Pay close attention to things like navigation menus, image scaling, and button placement.
- E-commerce Flow Simulation: This is non-negotiable. Go through the entire buying process. Add an item to the cart, view the cart page, and click through every single step of the checkout.
- Content and Link Integrity: Click every link on your site—header, footer, buttons, in-text links—to make sure they point to the right place and aren't broken.
Pro Tip: You're too close to the project to be an objective tester. Ask a friend or colleague who has never seen the site before to run through your checklist. Their fresh eyes will catch issues you've become completely blind to.
Using Shopify Theme Check
Shopify gives us a fantastic tool called Theme Check to help maintain high code quality. It’s a command-line tool that analyzes your theme files for errors and makes sure you're following Shopify’s best practices. It's like having an experienced Shopify developer looking over your shoulder.
Running it is super simple. From your theme’s root directory, just execute the command shopify theme check. It will scan all your Liquid, JSON, CSS, and JavaScript files and flag potential problems, such as:
- Using deprecated Liquid tags
- Missing templates or invalid JSON files
- Performance issues like inefficient loops
- Accessibility problems
Make Theme Check a regular part of your workflow. Running it periodically as you build a Shopify theme ensures your code stays clean, maintainable, and optimized for the platform.
Deploying Your Theme to the Live Store
Once your theme has passed all your tests and you've fixed any issues from Theme Check, you're ready to go live. Deploying with the Shopify CLI is the safest and most reliable method.
The process is straightforward and gives you total control. First, you'll push your local theme files to your Shopify store as a new, unpublished theme. You can do this with the command shopify theme push --theme "My New Custom Theme". This creates a copy in your theme library without touching your live site.
From there, you can preview it one last time in a real-world environment. This is also a good moment to think about your data, especially if you're moving from an old theme or another platform. For a smooth transition of all your store's information, a well-planned Shopify store migration is key.
When you're 100% confident, just head to Online Store > Themes in your Shopify admin, find your new theme, and hit "Publish." Congratulations—your custom Shopify theme is now live
Common Questions About Building a Shopify Theme
When you're diving into theme development, it’s completely normal for questions to pop up. It's a complex process with a lot of moving parts, and even those of us who have been doing this for years still run into new puzzles. Here are some straightforward answers to the questions I hear most often from developers and merchants.
How Long Does It Take to Build a Custom Shopify Theme?
This is the classic "it depends" question, but I can give you some realistic goalposts. The timeline really boils down to the scope and complexity of the project.
For a relatively simple custom theme, you might be looking at 40 to 60 hours of work. Think of a unique homepage layout with some styling adjustments to the standard product and collection pages. This estimate assumes you're building on a solid foundation like the Dawn theme, focusing mostly on visual changes rather than inventing new features.
But, if you're aiming for a truly one-of-a-kind theme with custom functionality, the hours can stack up fast. Things like a custom product builder, intricate animations, or specialized app integrations can easily push a project into the 150 to 300+ hour range. The real key here is to meticulously map out every single feature and design detail beforehand. That’s the only way to get an accurate scope and timeline.
Should I Modify a Free Theme or Build from Scratch?
This is a big strategic choice that hinges on your vision and budget. Honestly, for most stores that just need targeted design updates, customizing a great free theme like Dawn is the smartest, most efficient way to go.
Why? You’re starting with a theme that's already performance-optimized, accessible, and packed with features. Shopify has done all the heavy lifting on the core stuff, letting you zero in on what matters most: your branding and user experience.
On the other hand, building from scratch is the right call if your design is a complete departure from anything out there or if you need to build in unique business logic. This route gives you total control and leads to cleaner code because you won't be fighting to override tons of default styles and scripts.
A good rule of thumb I always tell clients: If your changes are mostly cosmetic—think colors, fonts, or shuffling sections around—modify a base theme. If you need to fundamentally change how the store works, a from-scratch build will be cleaner and more scalable in the long run.
What Are the Most Common Mistakes to Avoid?
Over the years, I've seen a few recurring tripwires that can really derail a theme project. Steer clear of these, and you'll save yourself a world of pain.
- Forgetting Mobile-First Design: It’s so easy to get lost designing on a big, beautiful desktop monitor, but the hard truth is that most of your traffic will come from mobile. Always start your design and styling for the smallest screens first, then work your way up.
- Writing Bloated Code: Don't just dump every script and stylesheet on every single page. That's a surefire way to kill your site speed. Be disciplined and only load assets where they are actually needed.
- Hardcoding Content: Never, ever put text like a promotional banner headline directly into a Liquid file. Always use theme settings (via schema) so the merchant can update it themselves from the theme editor without having to call a developer.
- Neglecting the Checkout Process: So many developers pour all their energy into the storefront and then forget to test the entire checkout flow. A bug here isn't just an inconvenience; it's a direct blocker to making money.
If you keep performance, maintainability, and the merchant’s experience at the forefront, you’ll be in great shape.
Can I Use JavaScript Frameworks Like React or Vue?
Absolutely, and it's a fantastic way to add rich, app-like experiences to your store. While Liquid handles Shopify's server-side rendering, you can definitely integrate modern JS frameworks like React or Vue.js for specific interactive components.
A perfect example is building a complex product customizer where a customer can pick options, see a live preview, and get a price that updates on the fly. Another great use case is an advanced search filter that updates the product grid instantly without a page reload.
The standard approach is to "mount" your JavaScript application onto a specific element within a Liquid template or section. This gives you the best of both worlds: the raw speed of server-side rendering from Liquid for most of the page, and the dynamic interactivity of a framework right where you need it. Just be mindful of the performance hit and make sure your components are well-optimized.
Ready to build a Shopify theme that truly stands out and drives sales? At E-commerce Dev Group, we specialize in creating custom, high-performance Shopify experiences. Our team of expert developers can bring your vision to life with clean code and a focus on conversion. Let's build something amazing together.